#
Kali virtual machine install

For some penetration testing engagements, it might make sense for you to deploy a penetration testing system in your Azure tenancy, rather than have 7 Minute Security ship you a physical device. Below are the steps to create the Kali virtual machine:
Log into your Azure portal at https://azure.microsoft.com.
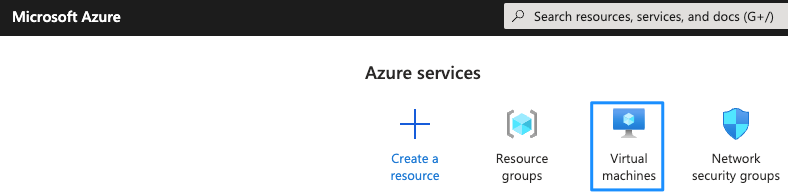
From the main portal menu, click Virtual Machines:
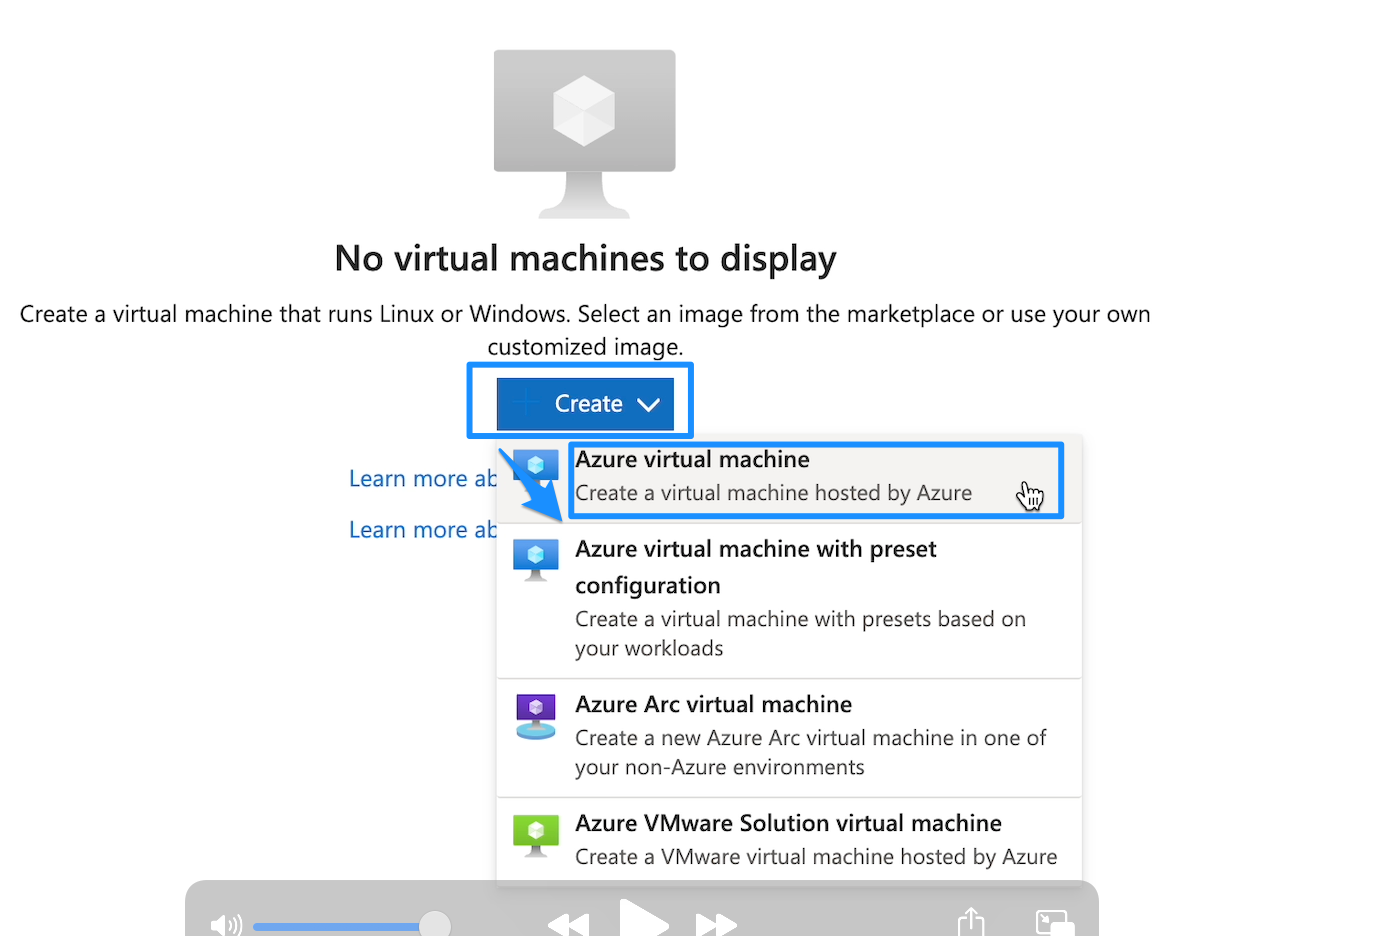
- Click Create > Azure Virtual Machine:
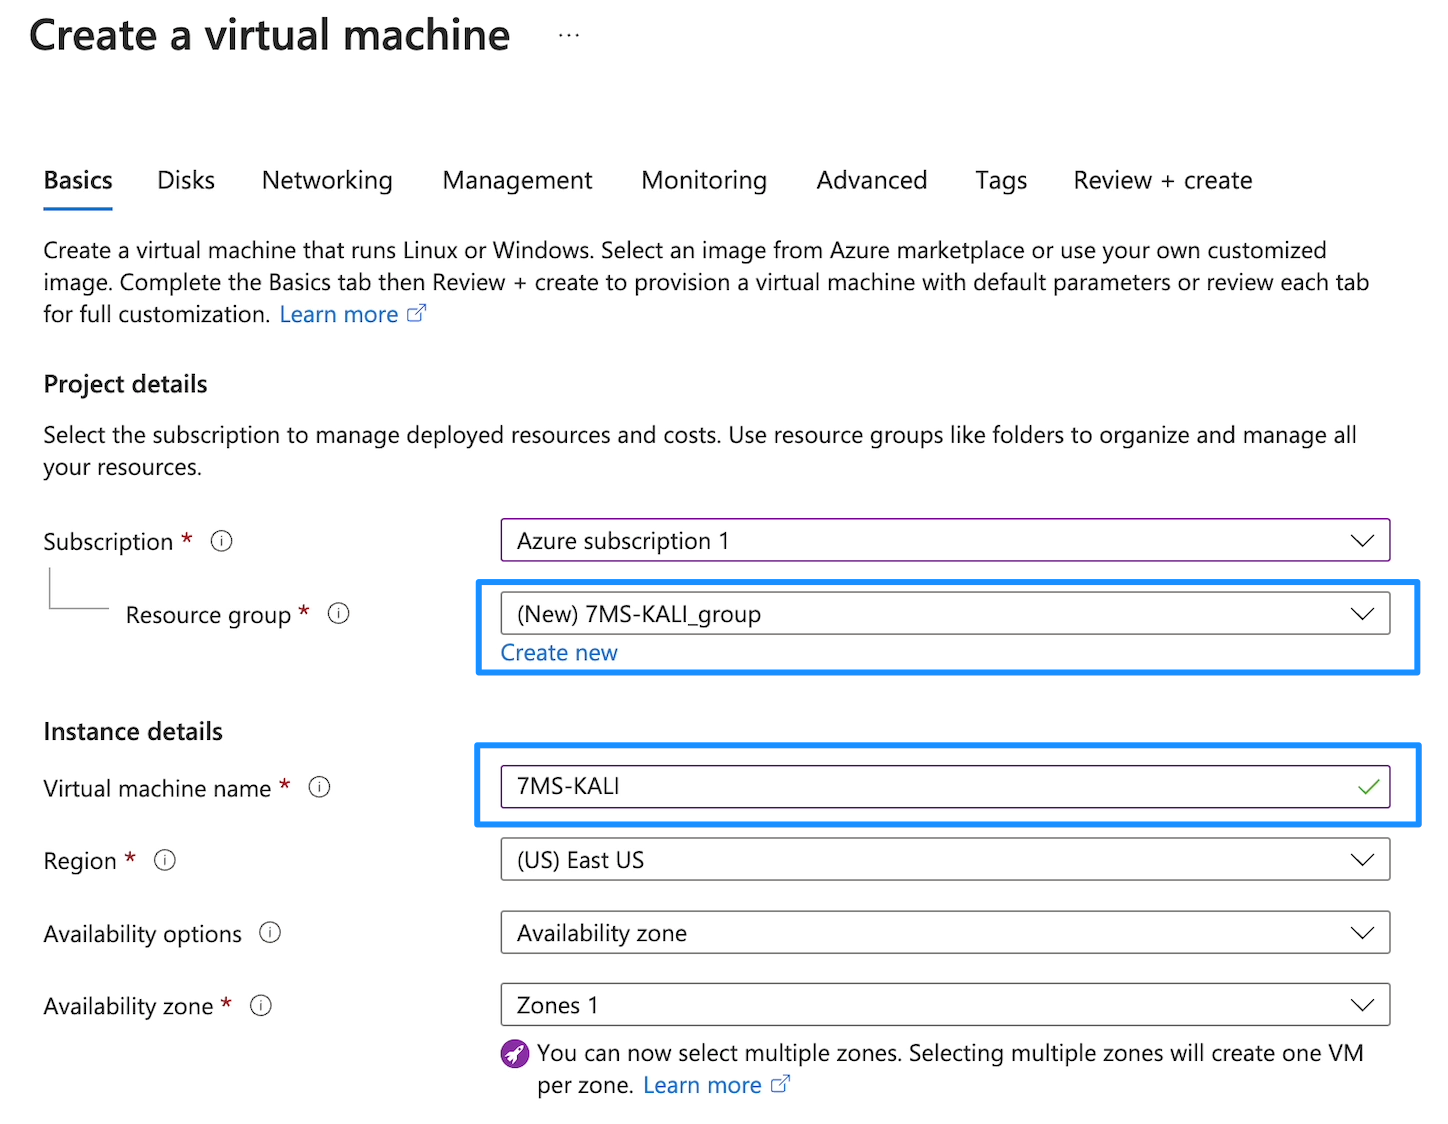
- Select and/or fill out the Subscription, Resource Group and Virtual Machine Name. In our example, we selected our default subscription, made a new resource group called 7MS-KALI_group and named the machine 7MS-KALI:
- Under Image, click the drop-down box and choose See all images:

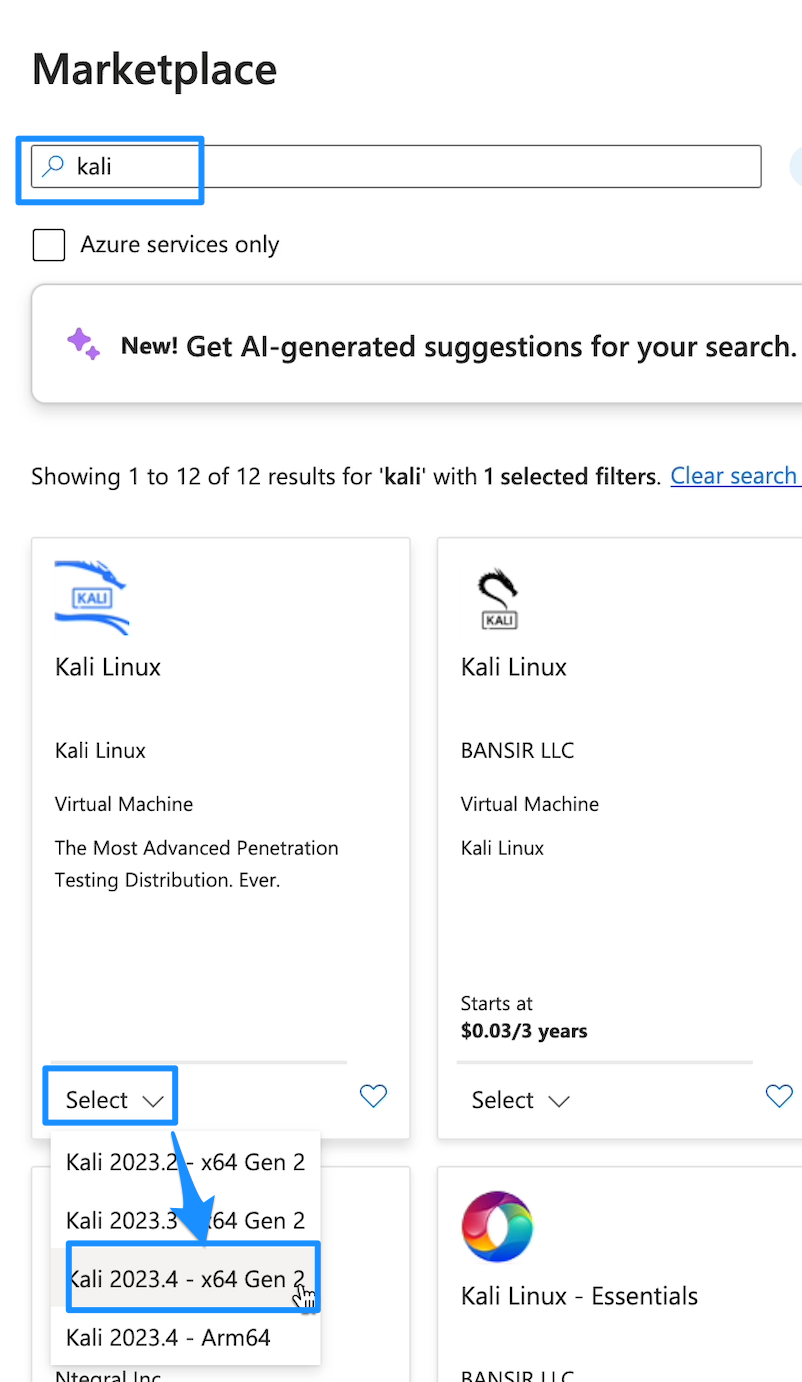
- Within the marketplace, type in the search Kali, and then from the results, underneath the Kali Linux image, click the drop-down and choose Kali 2023.4 -x64 Gen 2:
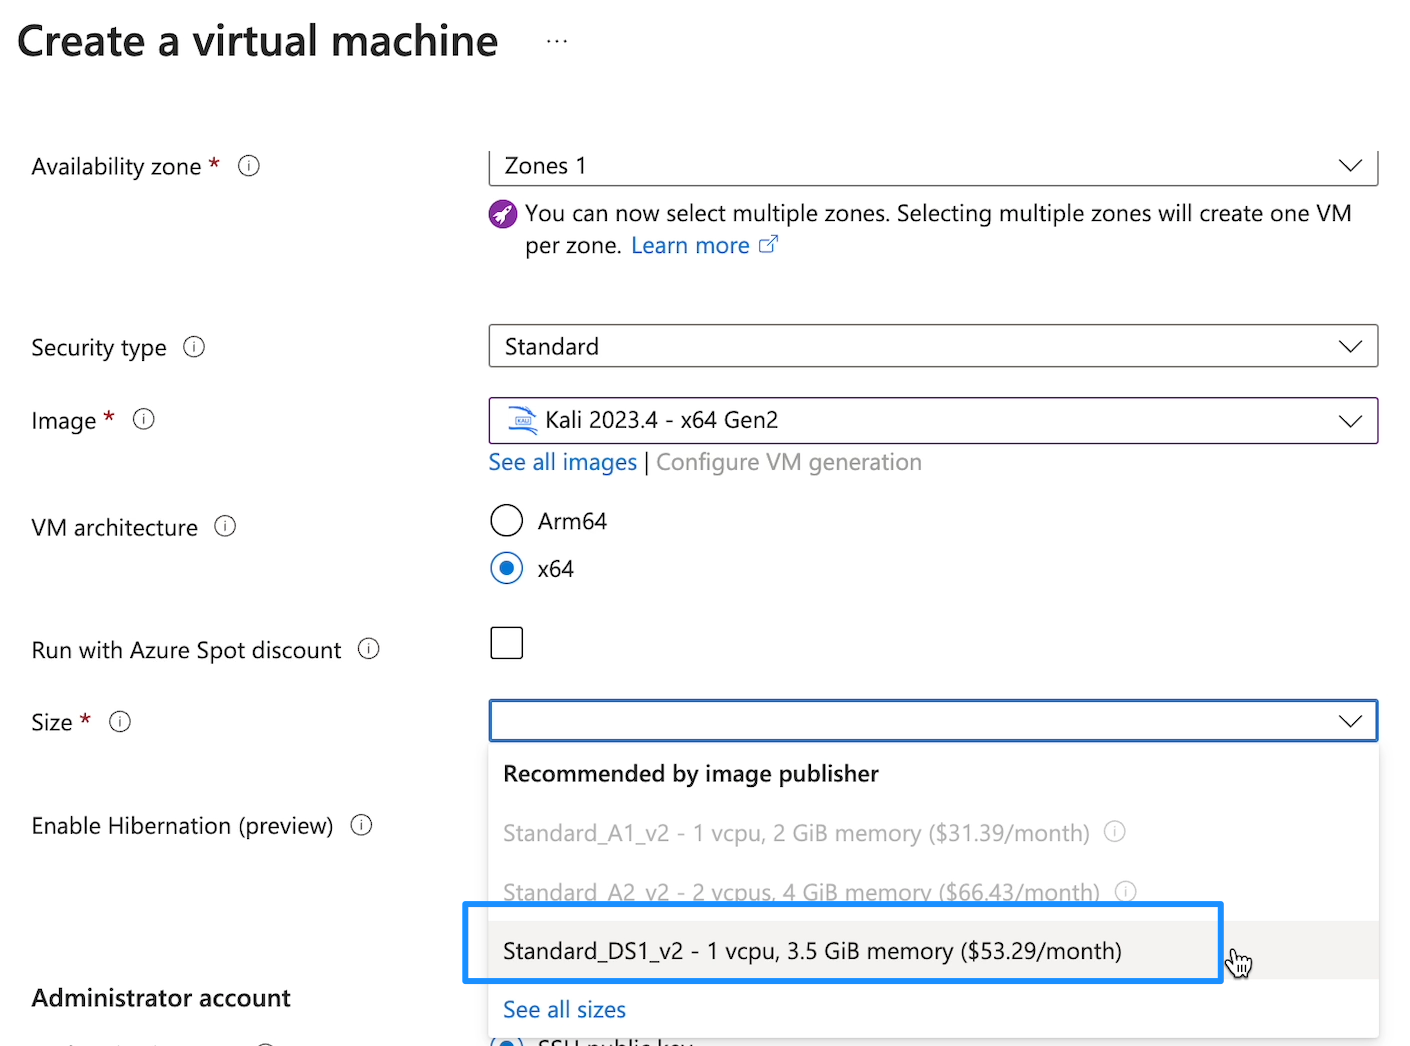
- Back at the Create a virtual machine screen, select the Size dropdown and choose Standard_DS1_v2 - 1 vcpu, 3.5 GiB memory:
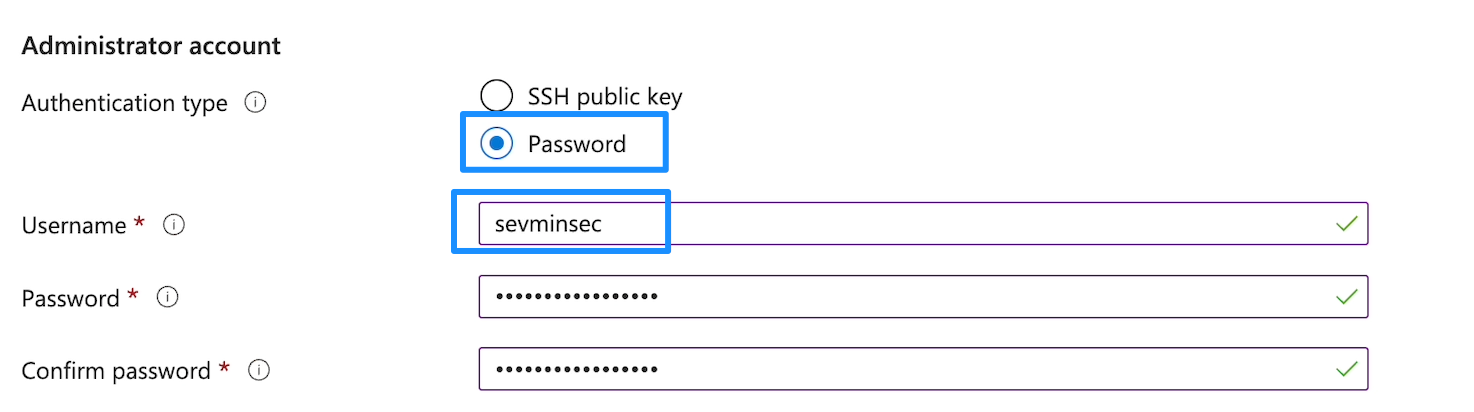
- Under the Administrator Account section, choose Password, create a user called sevminsec and then a long/strong/unique password such as one generated with 1Password (7 Minute Security will arrange a secure email thread to send this password through):
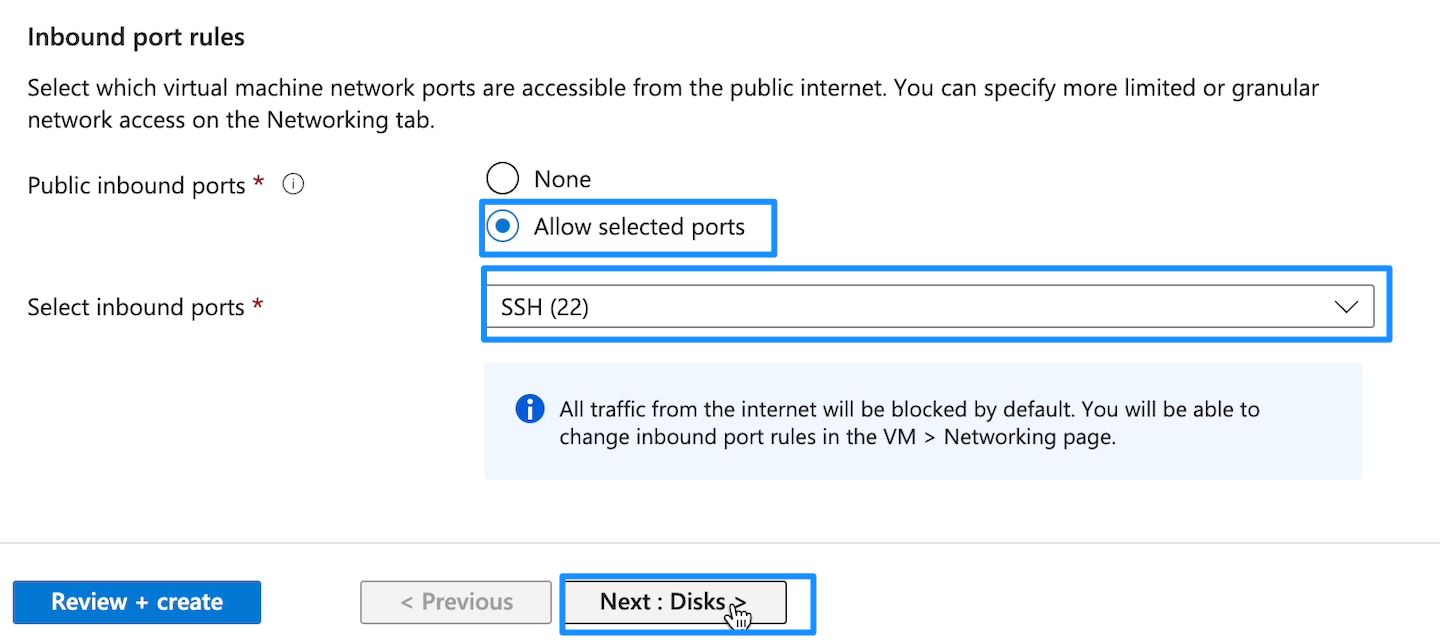
- Near the bottom of this screen, ensure that under Public inbound ports that Allow selected ports is selected, that SSH is highlighted in the drop-down, and then click Next: Disks >:
- Under OS disk, click the drop-down next to OS disk size and choose 64 GiB (P6), then click Next: Networking >:

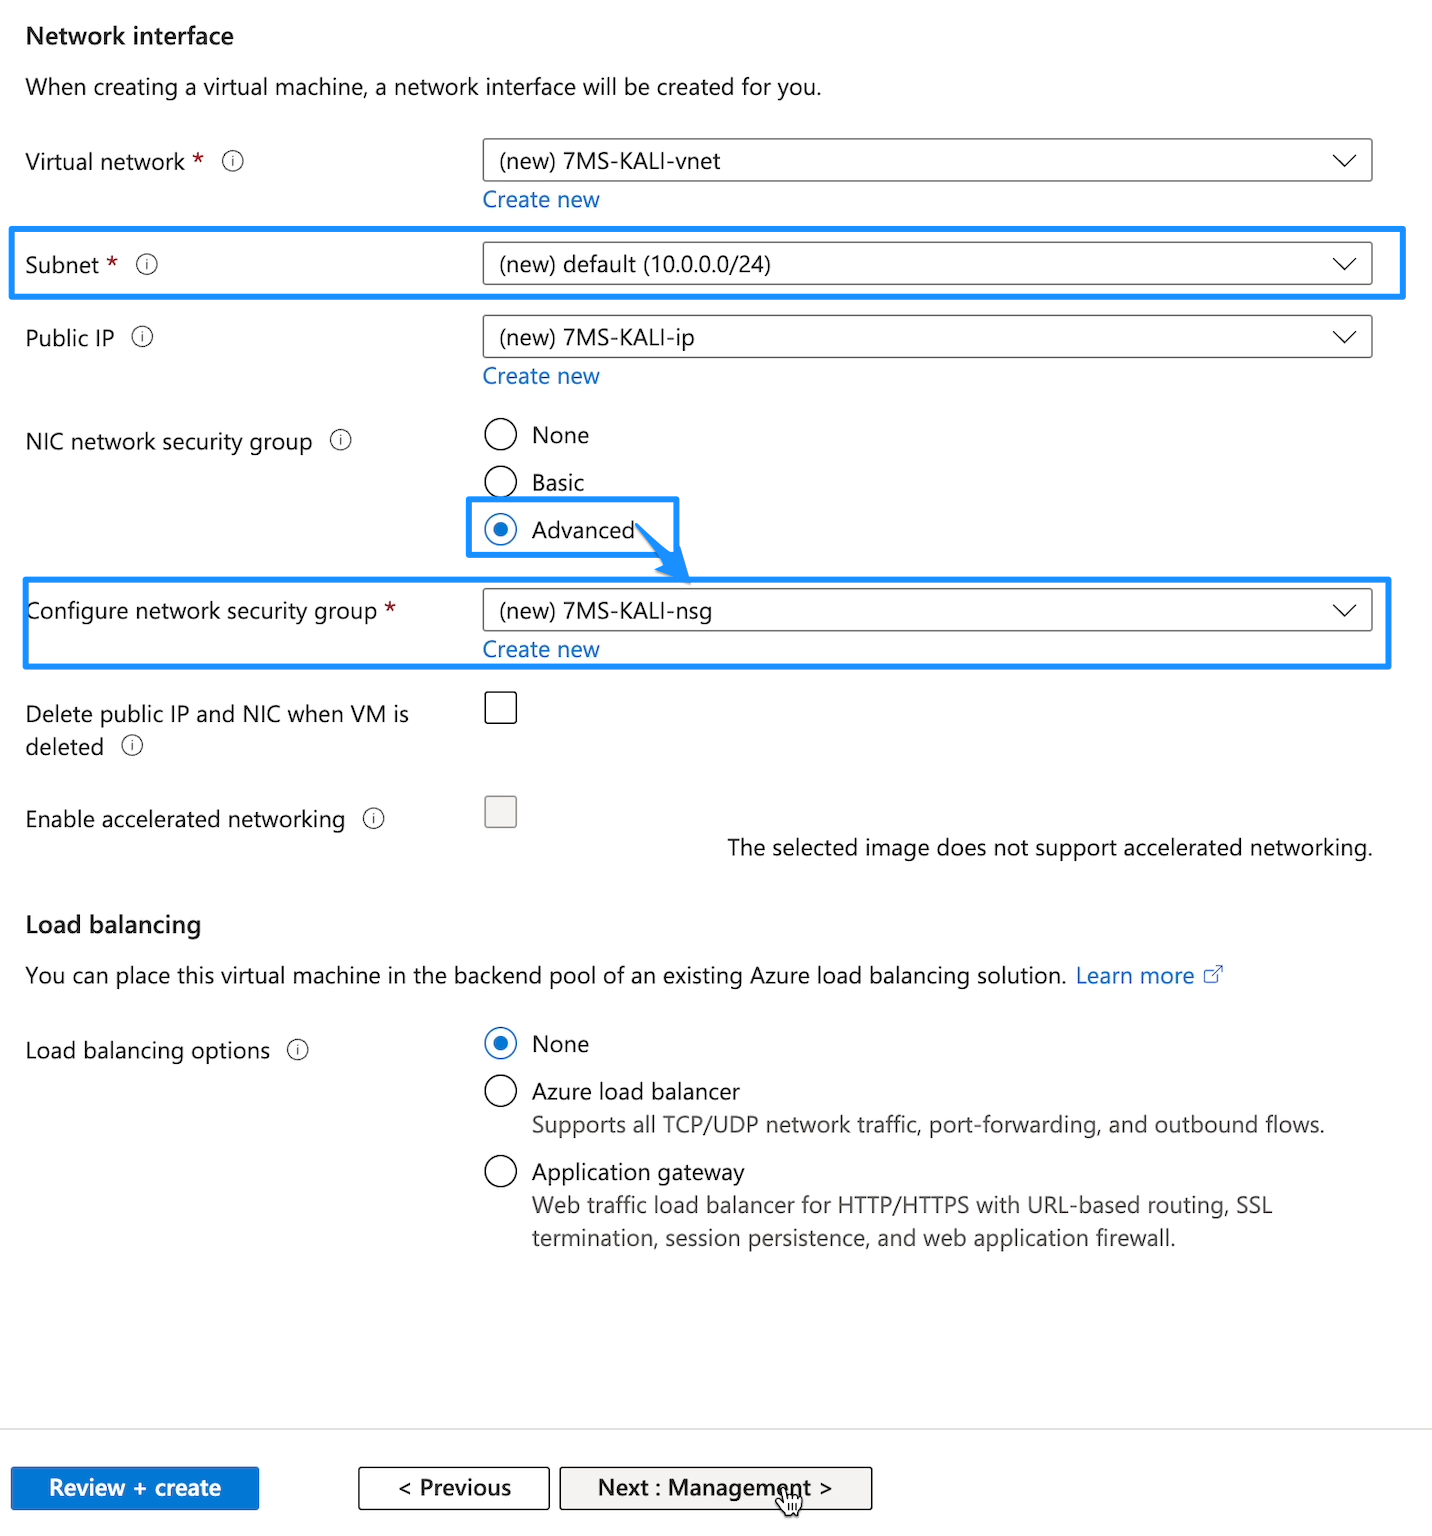
- Under Network interface, ensure the correct Subnet is selected. Then, under NIC network security group, choose Advanced, and under Configure network security group, click the 7MS-KALI-nsg. Then click Next: Management > to continue:
Under the Management tab, leave all defaults and click Next:Monitoring >
Under the Monitoring tab, leave all defaults and click Next: Advanced >
Under the Advanced tab, leave all defaults and click Next: Tags >
Under the Tags tab, leave all defaults and click Next: Review + create >
Under the Review + create tab, double-check the configuration and click Create.
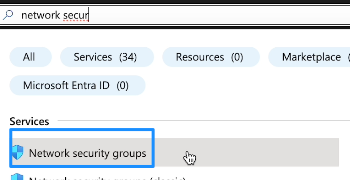
Back at the main Azure portal, search for network and then select Network security groups:
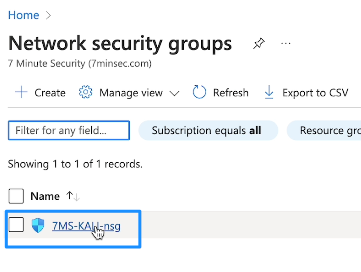
- Under Network security groups, click the one assigned to the Kali VM:
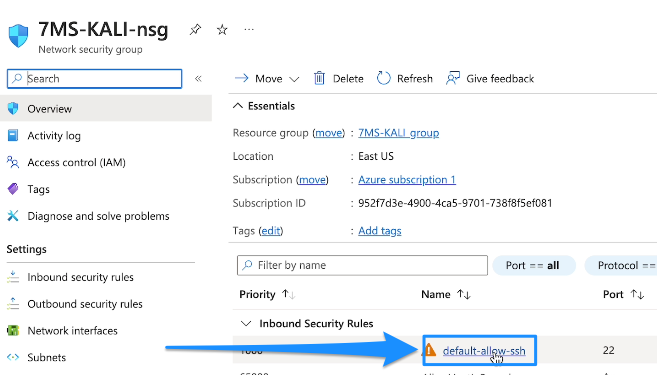
- From the network security group rule list, locate and click on default-allow-ssh:
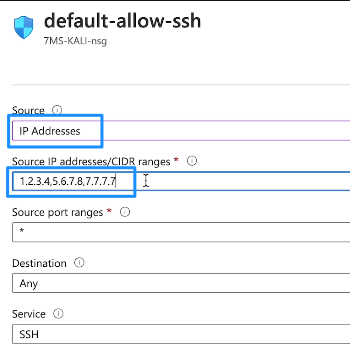
- Within the default-allow-ssh rule, ensure under Source that IP Addresses is selected, and then under Source IP addresses / CIDR ranges you copy/paste in the IPs/subnets provided by 7 Minute Security (IPs below are just for demonstration purposes), as well as any IPs you will want to connect to the VM from:
When all the IPs/subnets are configured, click Save at the bottom of this rule: