
#
Pentest sensor install

#
7-step quick start install guide
- Ensure the pentest sensor will be plugged into a network where three (3) IP addresses can be pulled from DHCP.
- Go to splashtop.com/check and ensure our device will be able to "phone home" successfully.
- Connect the pentest sensor to the network.
- Press the power button on the front of the device.
- Provision a basic Active Directory account for 7 Minute Security to use for testing.
- Send the credentials securely via 7 Minute Security's customer portal.
- Let 7 Minute Security know the device is online and we'll ensure we can remote into it.
#
Detailed install guide
#
Considerations/prerequisites
Permissions - you will need to secure necessary permissions for 7 Minute Security to scan and/or pentest the infrastructure that is in scope for testing - be that from internal departments or relevant third parties (ISPs, MSPs, etc.).
Network access - our testing device (which we will install or ship to you) requires three (3) IP addresses to use for the duration of the test (for internal pentests). It is easiest for us if we are plugged into a network with DHCP enabled, but we can also assign static IPs to the device if required.
A low-privileged Active Directory account - 7 Minute Security will approach the internal network penetration test from an "assume compromise" narrative, so we ask for an Active Directory account to be setup for us to use during testing. This account can be setup however you would provision a typical new employee. For example, if a common role at your company is customer service representative, and you give every new hire access to a few AD security groups as well as an "S drive" with shared files, setup our account in the same way. The account does not need to have special privileges, such as being a member of the Domain Admins group.
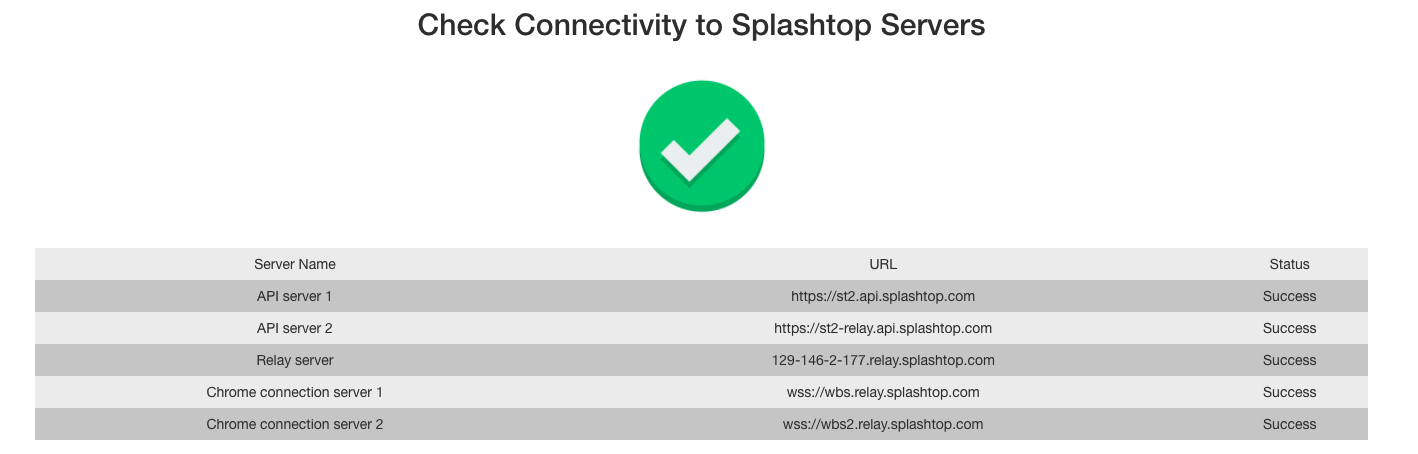
Remote access considerations - 7 Minute Security uses Splashtop to be able to manage penetration tests remotely. From the network that our scanning device will be plugged into, please run the Splashtop connectivity check and make sure you get a result similar to this screenshot:
#
Physical installation
If you are engaged with 7 Minute Security on a vulnerability assessment and/or penetration test, we will ship you a Light Pentest sensor that looks like this:

To get the Light Pentest sensor connected and powered up, follow these steps:
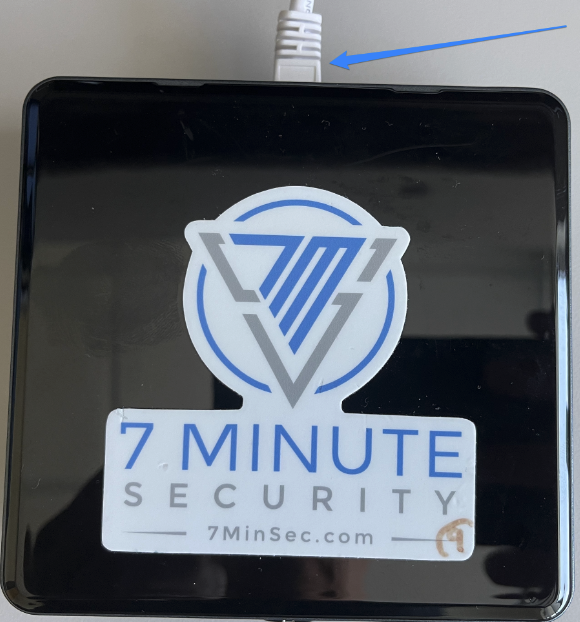
- First, connect the Light Pentest sensor to the network:
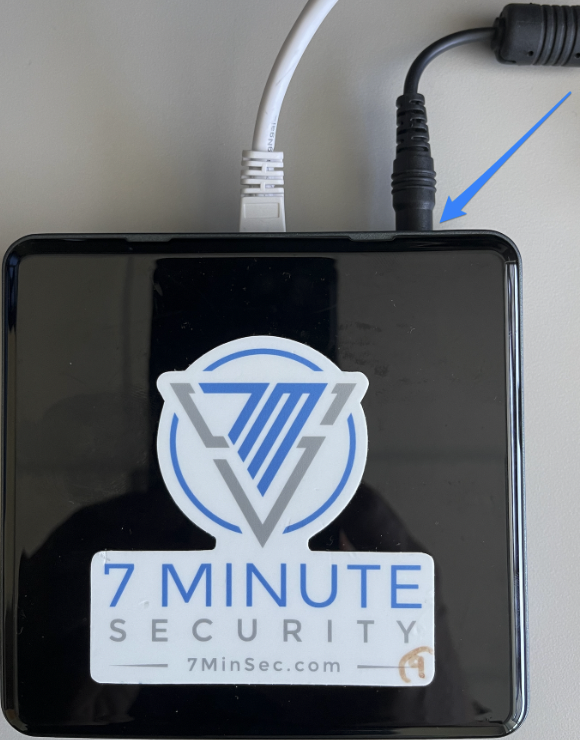
- Next, connect power:
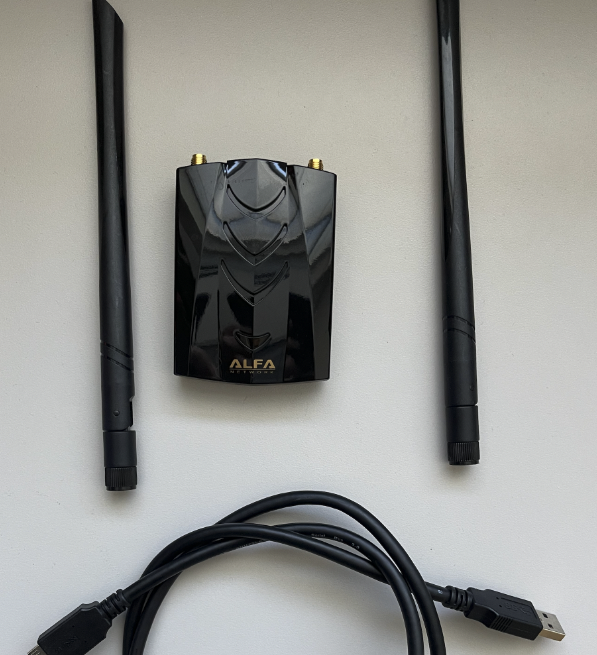
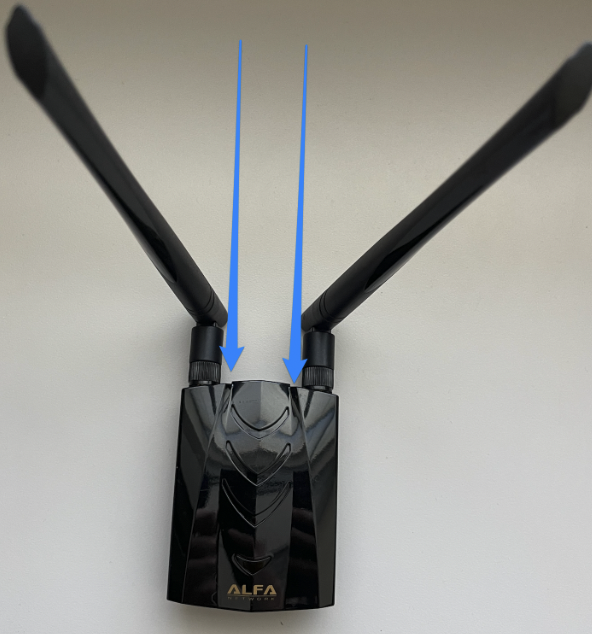
- Optional: if your project includes a wireless network assessment, your package will include a wireless USB network adapter, a USB cable, and two antennas:
Connect the antennas to the USB network adapter:
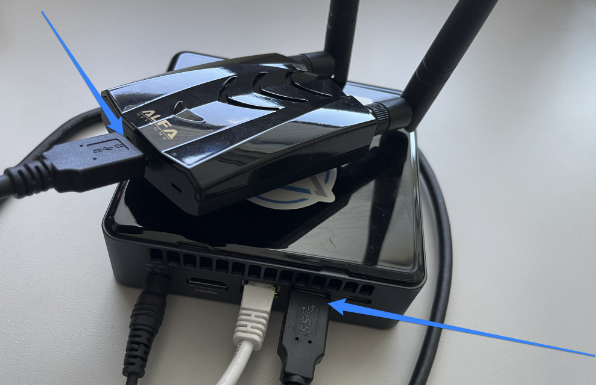
Then connect the USB A end of the cable to the NUC, and the other end to the wireless network adapter:
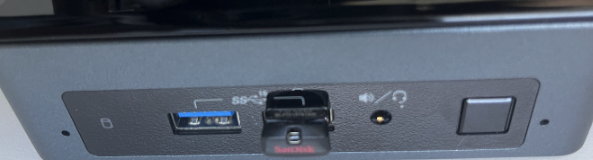
- At this point, check the front panel of the Light Pentest sensor. It should either have no lights shown on the front, or an amber colored light:
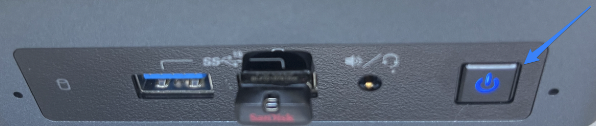
- Press the power button, and then the front panel should turn blue:
At this point, the Light Pentest sensor should boot up and grab 3 IP addresses via DHCP, and call home to 7 Minute Security headquarters so we can begin your assessment.